Straighten - The Second 5S
Sorting your work area is a great first step and a good introduction for the team in the work area on how 5S works. It builds morale and teamwork of the staff working in the process when they see managers, supervisors and staff working together to create a 5S showcase area that can be used as a template for all other 5S areas in your process.
Straighten is an important step in the 5S process because you will start to organize the work area without the unwanted items in the area. When the work area is organized, it will help you find and store items quicker in a regular workday. In the next part of the article, we will show you the steps that you should take to be successful in organizing your work area.
Step 1 - Put Items Away
No matter what the item is, you need to find a storage location where you will always store that part or tool in this work area. This designated spot will be labeled and identified in your inventory tracking spreadsheet or Material Replenishment Program. This is done so that you and anyone who is searching for this part will be able to find it through your system. A simple way to remember this and convey it to the 5S team is “Every item has a home”. I know it sounds simple and that’s why it works, keep saying it and your team will start to spread the message.
When you have stored all the items or tools in a rack, drawer, or toolbox, you will be able to start on the next step of your organization of this work area, labeling.
Step 2 - Labelling
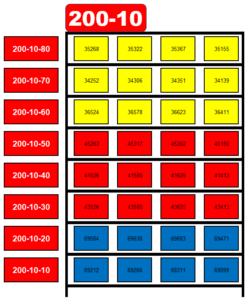
Labeling the racks and parts bins in a work area will help you keep parts stored correctly and will reduce the chance that someone will move these parts to a different area in the process. Below is a picture of a labeled rack for a work area, see that the labels are big enough to see the number and the location.
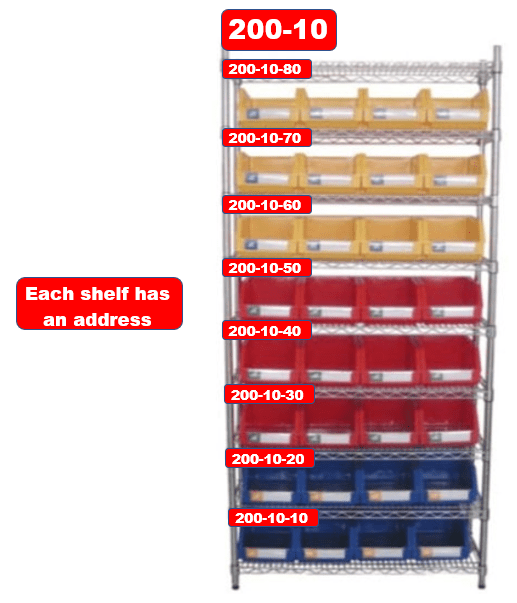
There are many different labels that you can choose, run some trials with your team and see which label suits your area the best. You can also choose different formats that can be voted on by the team as well. Both the size and format of the label should be agreed upon by your team before you get too far, you do not want to change hundreds of labels because there was an improvement that the team wanted to make to the labels.
Step 3 - Create Addresses
Depending on how big your factory or business is, you might have different locations where parts or items are stored for your process. If you have an address system in your factory, congratulations. You can read through the next piece of information and it may improve your address system or it may be very similar to what we will cover.
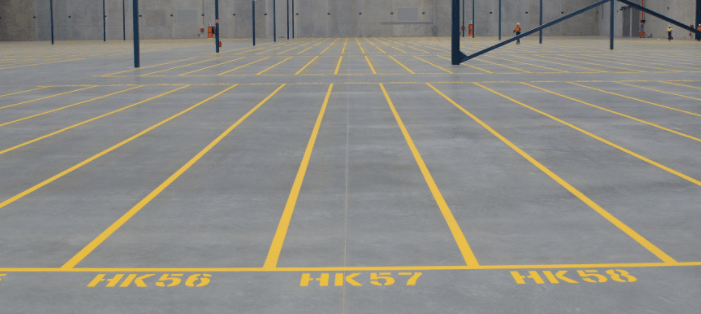
An address system is important because it will allow your team to map your factory and make it easier to put things away for your material handlers. The address system will give your factory a street or coordinate system to organize the part storage. Below is an example of a warehouse that is organized by a coordinate system.

There are many different labels that you can choose, run some trials with your team and see which label suits your area the best. You can also choose different formats that can be voted on by the team as well. Both the size and format of the label should be agreed upon by your team before you get too far, you do not want to change hundreds of labels because there was an improvement that the team wanted to make to the labels.
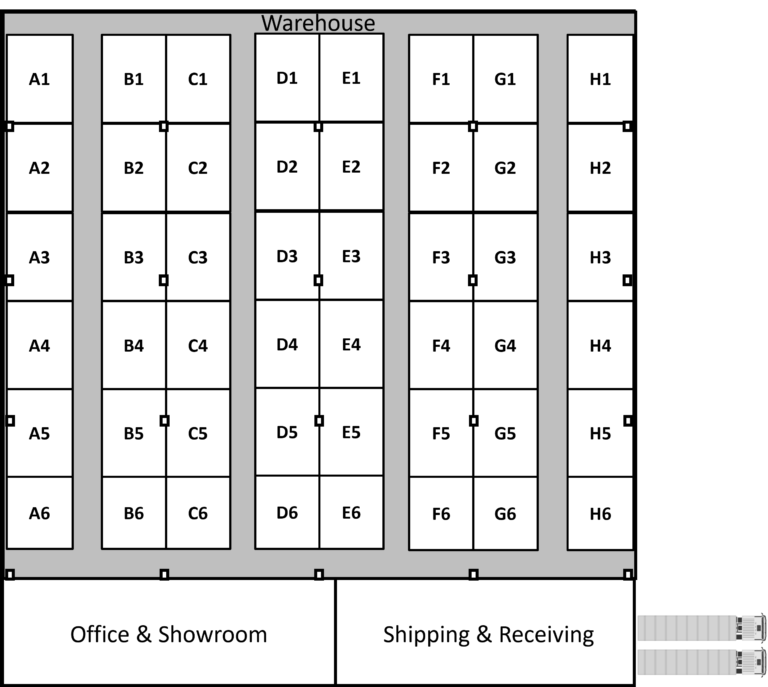
You can now see how easy it would be for someone to put parts away in A1.
Ones you have completed your address or coordinate system for your factory, you will need to create a part presentation system for racks that are stored in the work areas and warehouse. Below is an example I like to share with new teams that are starting to 5S their process.
- You will need a street number for your work area – Similar to the number on your house, these numbers identify a location in your factory
- Our Work Area number is 200
- Now you will need to give area parts rack and storage a different number so you can show everyone where the parts are stored on these racks.
- Our Rack number is 10
- On each rack, you will have multiple shelves and you will need to store parts on those shelves.
- Our Shelf number is 40

Use this example to complete your own address system in your work areas and factory.
Step 4 - Color Coding
No, it’s not grade 1 where I am going to teach you about primary colors and how to color inside the lines. Color coding is used in some automotive factories to help the workers in the area use the colors as a visual cue to find specific parts and tool organization.
There are many ways to color code your factory but I would like you to focus on the examples I give you below if you are starting to learn 5S. Always start with simple examples and implement these before you start adding too many colors in one work area. The simpler your system is, the easier it will be for staff to remember and follow your system.
These are some of the items you can color code in your work areas as a visual cue for helping staff in the area.
Parts Bins
Parts Bins can be color-coded to show categorized hardware, such as yellow for bolts and blue for nuts. You can also have two bin colors for the same part, bin one can be green and bin two can be yellow. This is done to show if parts are getting low in your Kanban system.

Tools
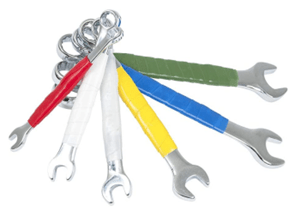
If you have multiple work areas on a production line, it is helpful to identify the tools with a different color to ensure that the tools do not accidentally get stored on the wrong tool board. I have used colored electrical tape on the tools as an indicator of which work area the tools belong to.
Cleaning Stations
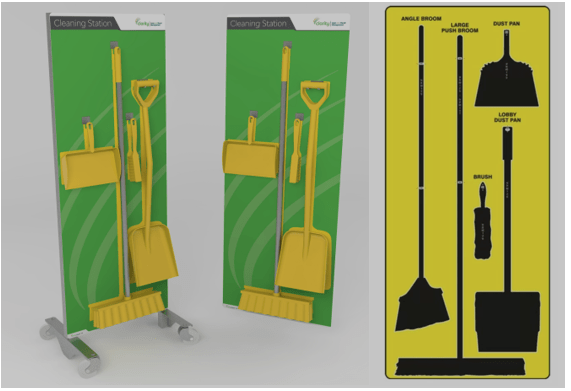
Making a clean station with different colors that stand out is very helpful when you are building a visual factory. It is a good idea to have a cleaning station in every area of the work area to help the clean-up at the end of the day. You will need to have the cleaning station stocked with all the tools and supplies that are needed daily.
Fixtures
Dedicated fixtures used in the work area should be painted or labeled a different color and have a home location where these tools can be stored. The storage rack or location should also be painted the same color to help with the visual factory.
Step 5 - Signs & Labels
As discussed in Step 2 – addresses, signs, and labels will be a big part of the Straighten 5S. I will say that this is my favorite step in his 5S because you can see the impact of creating and placing the labels and signs in all the work areas. Each home location should have an outline of where the item is stored and a label identifying the item.
Below are some examples of what typical 5S labeling will look like in most factories that practice 5S and have completed this part of their journey. Use the examples to create your standard or make modifications and create your own address and labeling system.
Racks
As shown in the picture below, each rack should have a location address that is visible from the main aisle way in your factory. This will make it easier for everyone to find the rack location to put away or use parts in the work area. The racks will also have parts labels with part information on the label so the team can find items quickly.
Work Center Signs
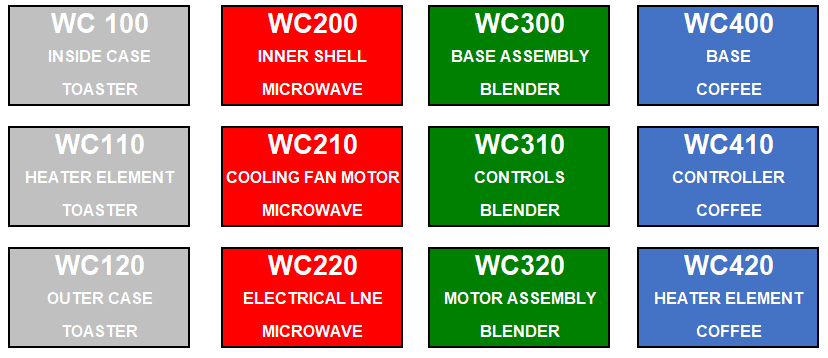
These signs are made so they can be seen from a distance for new team members to find when they are looking for a work center/area. As you can see below, there are four different colors because in this factory, there are four different product lines.
Floor Label Markings
If there is a designated spot that is required in the work area for a part or an In Process Kanban (IPK), you should add a painted/tapped square outlining the item. It is a good idea to label what goes in that square so no one else adds parts to this area when it is empty. These squares are usually color-coded so everyone knows not to move anything into the area unless it is the designated item.
Step 6 - Toolboards
There are some great examples of tool boards around the internet that can give you a good idea of different labeling and storage methods. When you start working on your tool board 5S labeling, make sure that all the tools are in the area before you start. You can imagine finishing your labeling on a tool board to find out you missed some tools, it is not a good feeling (trust me, it has happened to me a few times).